Best Mics for Recording Electric Guitar: Dynamic Workhorses & Studio Placement Techniques
Discover the best guitar recording mics for capturing massive, studio-quality electric guitar tones. Compare the top dynamic microphones and master placement.
Music Gear Specialist Review Desk
Gear Research & Analysis
ℹ️ Affiliate Disclosure: Music Gear Specialist earns from qualifying purchases through Amazon and other partner links. This doesn't affect our recommendations—we only suggest gear we'd use ourselves.
Capturing the true sound of a roaring guitar amplifier is one of the most satisfying experiences in audio engineering. Finding the best mic for recording electric guitar is crucial for capturing the visceral weight, complex phase relationships, and raw energy of a real speaker cabinet pushing air in a physical room.
However, recording an electric guitar is not as simple as placing any microphone in front of an amplifier and pressing record. The guitar recording mic you choose, the angle at which it points, and its distance from the speaker cone will shape your tone more dramatically than any post-recording EQ.
In this guide, we will break down why dynamic microphones are the industry standard for electric guitar, compare the four best dynamic workhorses on the market today, and explain the essential placement techniques you need to capture professional guitar tones in your home studio.
Why Dynamic Mics Beat Condensers for Electric Guitars
When setting up a home studio, many beginners assume that because large-diaphragm condenser microphones are highly detailed and expensive, they must be the best choice for every source. While condensers are unmatched for vocals and acoustic guitars, they are rarely the first choice for a loud electric guitar cabinet. Here is why:
1. High SPL Handling
A cranked 50-watt or 100-watt tube amplifier can easily produce sound pressure levels (SPL) exceeding 120 dB at the speaker grill. Large-diaphragm condensers utilize extremely thin, fragile, gold-sputtered diaphragms. Subjecting these delicate capsules to such extreme acoustic force can cause digital clipping at the mic’s internal circuit board or, worse, permanently stretch and damage the capsule itself. Dynamic microphones use rugged voice coils attached to sturdy diaphragms that can handle high SPL (often beyond 150 dB) without sweating.
2. Tailored Frequency Responses
Electric guitars are fundamentally midrange-focused instruments. They do not produce much usable sub-bass, and their ultra-high frequencies (above 8 kHz) are often heard as harsh, fizzy “fuzz.” Condenser microphones have wide, flat frequency responses that capture all that high-end fizz and low-end mud, requiring heavy filtering in your DAW. Dynamic microphones naturally roll off these extreme lows and highs while offering a “presence bump” in the upper-midrange (usually between 2 kHz and 5 kHz) that helps the electric guitar slice through a dense rock or metal mix.
3. Acoustic Isolation
In a home studio or live stage environment, room acoustics and bleed from other instruments can ruin a recording. Condenser mics are incredibly sensitive and will pick up reflections from untreated walls or the sound of nearby instruments. Dynamic microphones have lower sensitivity and tighter polar patterns, capturing only the direct blast from the speaker speaker cone and ignoring the surrounding environment.
The Essential Guitar Speaker Anatomy
Before miking your amplifier, you must understand the anatomy of the speaker cone behind the grill cloth. You cannot mic an amp effectively by guessing.
[!TIP] The Flashlight Trick: Take your smartphone flashlight and press it flat against the grill cloth of your amplifier. This will illuminate the speaker cone sitting inside, allowing you to see the exact structure.
Every guitar speaker contains three primary zones that produce distinct tones:
- The Dust Cap: The central dome of the speaker. This area produces the brightest, most aggressive, and high-frequency-rich sounds.
- The Cone: The paper portion sloping outward from the dust cap to the outer frame. This area produces a balanced blend of warmth, midrange body, and highs.
- The Edge: The outer rim of the speaker paper. This area produces the darkest, warmest tones with the least amount of high-end bite.
Master Placement Techniques
Small adjustments in microphone placement can completely change your guitar track from harsh and fizzy to warm and punchy.
graph TD
    A["Mic Placement Decision"] --> B["Angle (Axis)"]
    A --> C["Lateral Position"]
    A --> D["Distance"]

    B --> B1["On-Axis (Bright, punchy, aggressive)"]
    B --> B2["Off-Axis 45° (Smoother highs, warm, vintage)"]

    C --> C1["Center / Dust Cap (Maximum brightness, piercing)"]
    C --> C2["Cap-to-Cone Junction (The Sweet Spot - balanced)"]
    C --> C3["Cone Edge (Warm, dark, bass-heavy)"]

    D --> D1["Close Miking (0-2 inches: Heavy bass via proximity effect)"]
    D --> D2["Distant Miking (3-12 inches: Natural, balanced, integrates room)"]
On-Axis vs. Off-Axis Miking
- On-Axis: Pointing the microphone capsule perpendicular to the grill cloth (pointing straight at the speaker). This configuration captures the fastest transients, the most top-end bite, and a highly focused tone. Excellent for modern metal, tight rhythm sections, and leads that need maximum presence.
- Off-Axis: Angling the microphone capsule (usually at 45 degrees) relative to the grill cloth. This diffuses the high frequencies, smooths out harsh distortion “fizz,” and captures a wider, rounder sound. It is highly favored for classic rock, blues, and warm clean tones.
Stand vs. Grill Drape Mounting
- Microphone Stands: Using a short, heavy-duty boom stand gives you absolute precision. You can adjust the angle, distance, and height down to the millimeter. However, stands take up floor space and can capture structural vibrations through the floor.
- Grill Drape (Flat-Front Mics): Microphones like the Sennheiser e609 and e906 are designed with flat bodies, allowing you to hang the XLR cable directly over the amplifier head so the microphone drapes over the grill cloth. This eliminates the need for a stand and decouples the microphone from floor vibrations. However, it restricts your placement options to close-up, on-axis miking.
The 4 Best Guitar Recording Mics Reviewed
Here is a comparison of the top four industry-standard dynamic microphones for electric guitar recording.
1. Shure SM57 — The Undisputed King
The Shure SM57 is the most recorded microphone in music history. It has been used on almost every legendary guitar cabinet since its introduction in 1965. It is virtually indestructible, incredibly affordable, and has a frequency response that was practically engineered for the electric guitar.
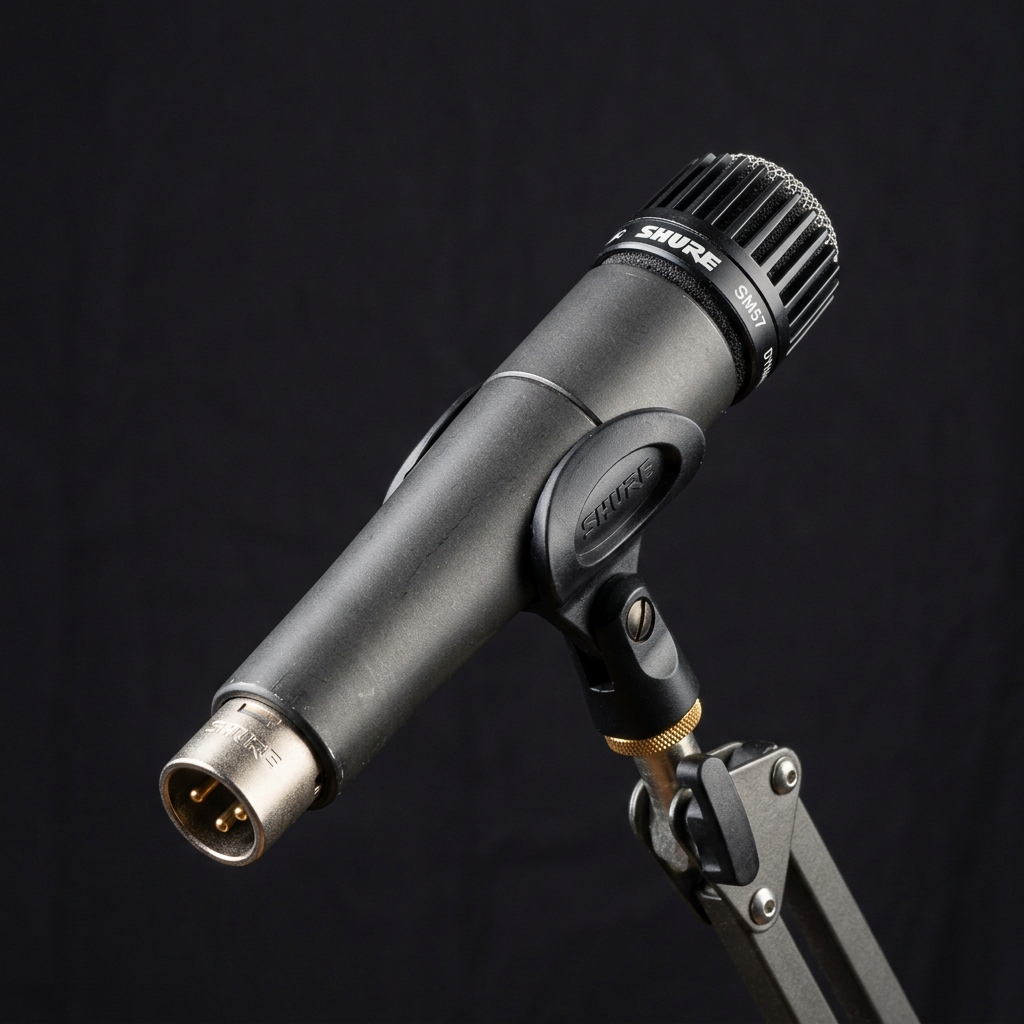
The SM57 features a pronounced presence peak around 4 kHz to 6 kHz, which highlights the articulation of pick attacks and the crunch of distortion. It also features a natural low-end roll-off starting around 200 Hz, which prevents your guitar tracks from building up low-end mud in the mix.
- Tonal Signature: Bright, punchy, mid-forward, aggressive pick attack.
- Ideal Placement: Pointing at the cap-to-cone junction, 1 inch away, slightly angled (off-axis) to tame the high-end bite.
2. Sennheiser e906 — The Studio Swiss Army Knife
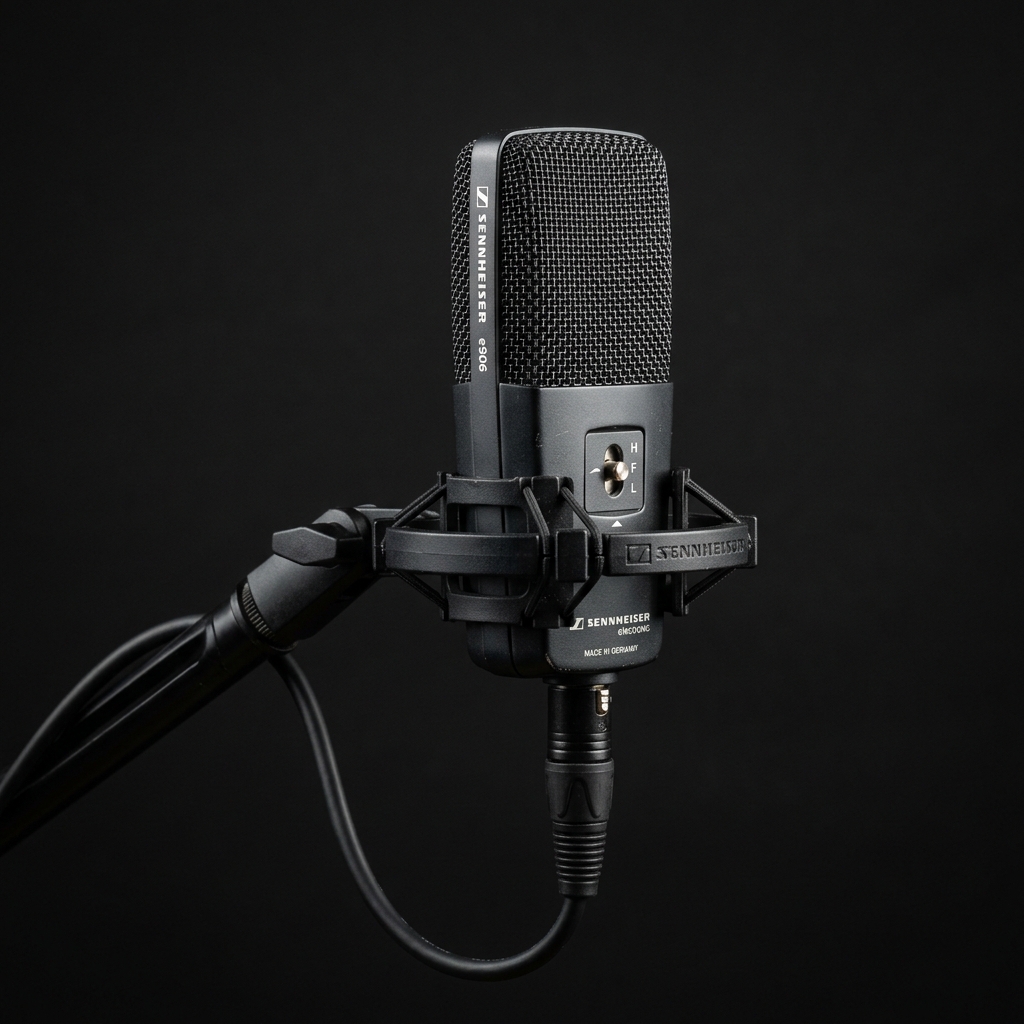
The Sennheiser e906 is a professional supercardioid dynamic microphone designed explicitly for miking guitar cabinets. Its flat-front profile allows it to drape over the grill cloth, but its real power lies in its three-way presence switch.
Sennheiser
Sennheiser e906 Professional Supercardioid Instrument Microphone
$199.00
Check Price on AmazonThe e906 contains a miniature slider switch on the back that alters its frequency response:
- Boosted Presence (Bright): Adds a high-frequency lift at 4.2 kHz, perfect for clean guitars that need extra shimmer.
- Flat (Normal): Captures a true, unaltered, warm representation of the amplifier cabinet.
- Attenuated Presence (Smooth): Dampens the high-mids, taming harshness on extremely bright amplifiers.
- Tonal Signature: Warm, punchy, detailed, with customizable high-end presence.
- Ideal Placement: Draped directly over the grill cloth, positioned halfway between the center dust cap and the speaker edge.
3. Sennheiser e609 Silver — The Gigging Guitarist’s Dream
The Sennheiser e609 is the budget-friendly sibling to the e906. It features the same flat-profile shape, allowing you to ditch the microphone stand, but it lacks the switchable presence filter.
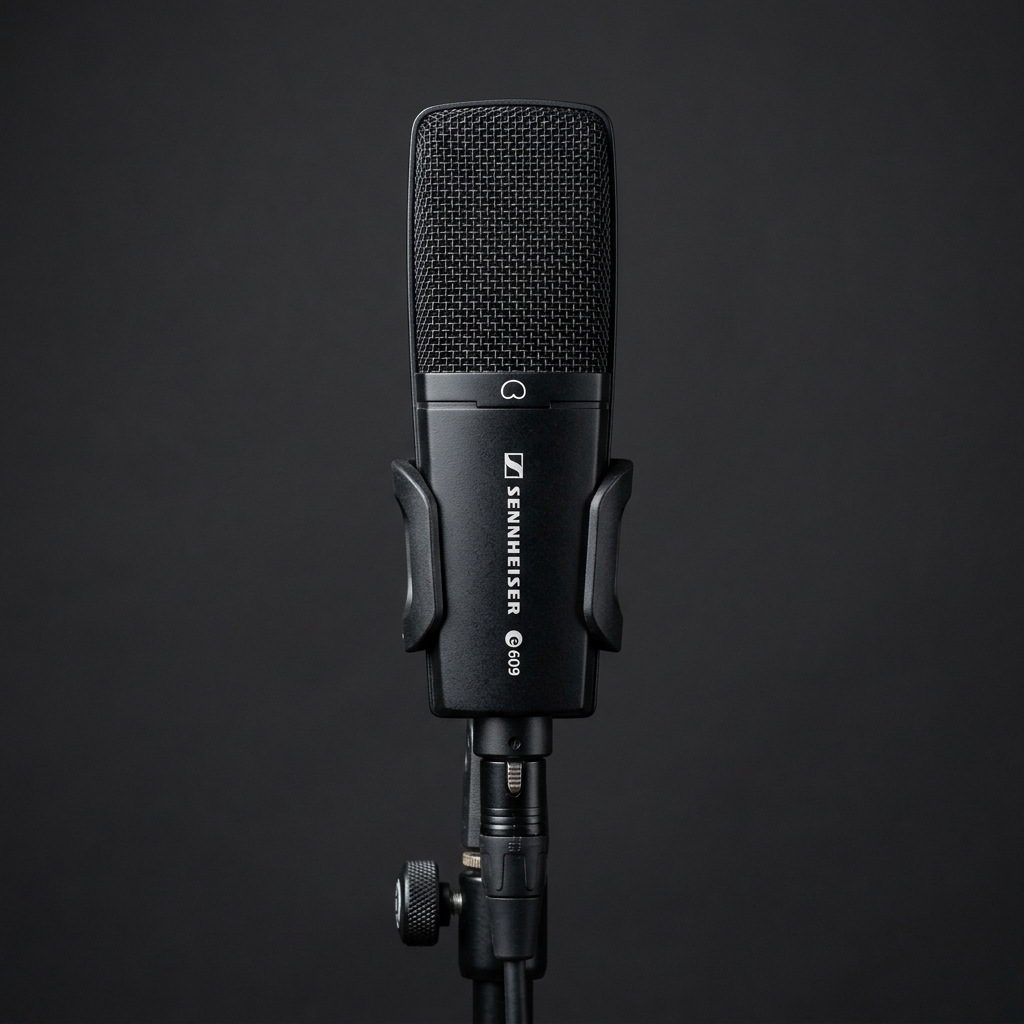
The e609 has a fixed frequency response that is voiced slightly brighter and more aggressive than the e906’s flat setting. It is excellent for rock and metal because its high-mid push ensures the guitar cuts through the mix immediately. Its supercardioid pattern offers incredible isolation, making it a favorite for live stages where you want to block drum bleed.
- Tonal Signature: Bright, direct, aggressive upper-mids.
- Ideal Placement: Draped directly against the grill cloth, pointing just outside the center dust cap.
4. Sennheiser MD 421-II — The Full-Frequency Giant
The Sennheiser MD 421-II is a legendary large-diaphragm dynamic microphone. Unlike the compact instrument mics above, the MD 421-II captures a massive, full-frequency picture of the sound source, making it highly popular for heavy rock, drop-tunings, and high-fidelity clean tones.
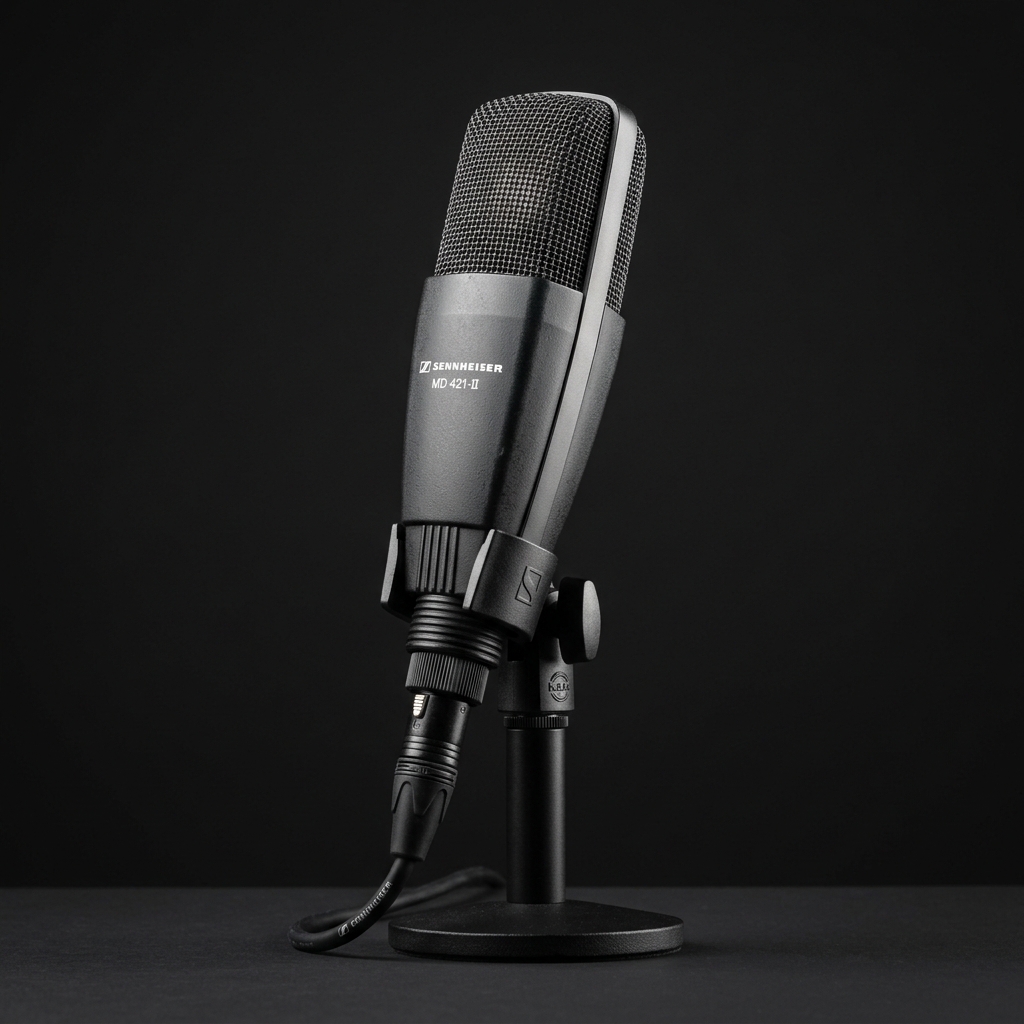
The MD 421-II features a 5-position bass roll-off switch, allowing you to counter the muddy bass build-up caused by the proximity effect when the microphone is placed close to the grill. Because of its larger capsule, it captures a thick, meaty low-midrange and a glassier high-end than an SM57.
- Tonal Signature: Wide, open, full-bodied lows, clean glass-like highs.
- Ideal Placement: Mounted on a sturdy stand, 2-3 inches back from the grill cloth, pointing at the speaker cone.
Dual-Microphone Studio Techniques
If you want a truly massive guitar sound, professional studios rarely rely on a single microphone. They blend multiple capsules to capitalize on the strengths of different microphones.
The SM57 + MD 421 Blend
This is the classic hard rock and heavy metal formula:
- Place the Shure SM57 close to the grill, pointing at the cap-to-cone junction (on-axis) to capture the biting midrange and sharp pick attack.
- Place the Sennheiser MD 421-II adjacent to it at the exact same distance from the grill cloth, pointing slightly further out on the cone to capture the low-end thump and warm body.
- In your DAW, blend the two channels to taste. The SM57 provides the “bite” while the MD 421 provides the “chest-thumping weight.”
[!WARNING] Phase Warning: When using two microphones on a single speaker cabinet, make sure the capsules are aligned at the exact same physical distance from the speaker grill. Even a tiny difference of a quarter-inch can cause phase cancellation, making your blended guitar track sound thin, hollow, and weak. Zoom in on the waveforms in your DAW to ensure the peaks and troughs align perfectly.
DAW Levels and Gain Staging
Once your microphone is placed and connected to your audio interface (like the Focusrite Scarlett 2i2), you need to set your levels.
Play the loudest, most aggressive part of your guitar track. Adjust the preamp gain on your interface so that the peak meter in your DAW sits around -12 dBFS to -18 dBFS.
Avoid letting the meter get anywhere near the red (0 dBFS). In digital recording, hitting 0 dBFS results in harsh digital clipping that permanently ruins the track. Giving yourself 12 dB of headroom ensures your performance captures all the natural dynamics of the amplifier cleanly.
Related Reading

Music Gear Specialist Review Desk
Research-based reviewsResearch-based reviews · Manufacturer specs · Verified owner feedback
We review guitars, amps, pedals, and recording gear the honest way: spec sheets, published measurements, and the collected experience of working musicians and verified owners.