Pedalboard Setup Guide: Signal Chain Order Explained
Learn the correct guitar pedal signal chain order and why it matters. Stop making your pedalboard sound like a mess.
Music Gear Specialist Review Desk
Gear Research & Analysis
ℹ️ Affiliate Disclosure: Music Gear Specialist earns from qualifying purchases through Amazon and other partner links. This doesn't affect our recommendations—we only suggest gear we'd use ourselves.
You bought five great-sounding pedals, plugged them all together, and now your signal sounds like it is being processed through a washing machine. The problem is not the pedals. The problem is the order you connected them in.
Pedal order is the single most overlooked factor in guitar tone. Two identical pedalboards with the same pedals in different order will produce dramatically different results, and one arrangement will sound professional while the other sounds like garbage. The physics of audio signal processing dictates a logical sequence, and understanding why that sequence works will make every pedalboard decision easier for the rest of your playing career.
Why Order Matters: The Signal Processing Chain
Think of your signal chain as a series of workers on an assembly line. Each worker (pedal) receives the product from the previous worker and performs their specific task on it. If the painter (reverb) goes before the sander (distortion), you sand off the paint. The product is ruined not because either worker is bad at their job, but because they worked in the wrong sequence.
Your guitar signal is the same. Each pedal processes whatever signal arrives at its input. A reverb pedal placed before a distortion pedal creates lush reverb tails that then get crushed and clipped by the distortion, turning your cathedral reverb into a fizzy, undefined mess. The same two pedals in reverse order produce beautiful distorted guitar with clean, defined reverb tails trailing behind each note.
The Standard Pedal Order
Here is the order that works for 90% of guitarists. We will cover the exceptions and creative rule-breaking after establishing the standard.
1. Tuner
Why first: The tuner needs the purest, cleanest version of your guitar signal to track pitch accurately. Any effects before the tuner add harmonics, sustain tails, and frequency content that confuse the tracking algorithm.
Recommended: The Boss TU-3 ($100) is the industry standard. Its buffered bypass also solves signal loss problems for the rest of the chain. The TC Electronic Polytune 3 ($100) lets you strum all six strings and see which ones are out of tune simultaneously, which speeds up live tuning dramatically.
2. Filters and Wah
Why second: Wah pedals and envelope filters are frequency-sweeping effects that respond to your picking dynamics. They need to receive your raw pick attack to respond expressively. Placing a compressor before a wah squashes your dynamics, making the wah feel sluggish and unresponsive.
Auto-wah and envelope filter pedals go here too. The Dunlop Cry Baby and Vox V847 are the classic wah options.
3. Compressor
Why third: The compressor evens out your dynamic range, making quiet notes louder and loud notes softer. Placing it after the wah means the wah gets your full dynamic range for expressive response, and the compressor smooths the signal before it hits your drive pedals.
A compressor before dirt pedals produces a tighter, more consistent distortion response. It sustains notes longer and reduces the volume spikes that can make distortion pedals sound harsh on hard-picked notes.
Recommended: The MXR Dyna Comp ($80) is simple and effective. The Keeley Compressor Plus ($130) offers more tone-shaping control with blend and tone knobs.
4. Overdrive and Distortion (Gain Pedals)
Why fourth: Gain pedals process the compressed, filtered signal and add harmonic distortion. This is the foundation of your driven tone. Multiple drive pedals stack in order from lowest gain to highest gain: a clean boost into a tube screamer into a high-gain distortion, for example.
Stacking order: If you use multiple dirt pedals, place them from least gain to most gain. A low-gain overdrive (like a Tube Screamer) into a high-gain distortion (like a Boss DS-1) produces a tighter, more focused distortion because the overdrive pushes the front end of the distortion pedal harder. Reversing the order produces a looser, more compressed sound.
Read our guitar pedals explained guide for detailed breakdowns of each drive pedal type.
5. Modulation (Chorus, Phaser, Flanger, Tremolo)
Why fifth: Modulation effects process your drive tone to add movement, width, and texture. Placing modulation after gain means the modulation effect processes the already-distorted signal cleanly, producing defined pitch shifts and sweeps.
Placing modulation before distortion works in some cases (phaser before fuzz is a classic combination that produces a unique, synth-like sound), but the standard after-gain placement is more versatile and produces cleaner results for most applications.
6. Delay
Why sixth: Delay repeats your signal at timed intervals. Those repeats need to contain your complete processed tone (distortion, compression, modulation) to sound coherent. Placing delay before distortion means every repeat gets distorted independently, which sounds mushy and undefined because the distortion amplifies and clips each fading repeat.
In the effects loop: If your amplifier has an effects loop, running delay in the loop instead of in front of the amp produces cleaner repeats because the delay processes the preamp’s distorted signal without being re-distorted by the preamp.
Recommended: The Boss DD-8 ($170) covers every delay type you need. The MXR Carbon Copy ($150) delivers warm analog delay tones with a simple three-knob interface.
7. Reverb
Why last: Reverb simulates the acoustic space around your sound. It should be the final effect because it needs to process your complete tone, including delay repeats, modulation, and distortion. Reverb before delay creates delay repeats of reverb tails, which sounds washed out and indistinct. Reverb after delay creates clean reverb tails that decay naturally around your delayed signal.
Recommended: The Strymon Flint ($300) combines tremolo and reverb in one pedal. The Boss RV-6 ($150) offers versatile reverb algorithms at a budget price.
The Complete Signal Chain Diagram
Guitar > Tuner > Wah > Compressor > Overdrive > Distortion > Chorus/Phaser > Delay > Reverb > Amplifier
If using an effects loop:
Guitar > Tuner > Wah > Compressor > Overdrive > Distortion > Amp Input
Amp Effects Send > Chorus/Phaser > Delay > Reverb > Amp Effects Return
When to Break the Rules
The standard order is a guideline, not a law. Some iconic tones come from intentionally “wrong” pedal placement:
Reverb before distortion: Creates a shoegaze wall-of-sound where the reverb tails get distorted into a thick, ambient wash. My Bloody Valentine, Slowdive, and most shoegaze bands use this approach intentionally.
Delay before distortion: The delay repeats get progressively more distorted as they decay, creating a chaotic, psychedelic texture. Pink Floyd and Radiohead use this for atmospheric sections.
Fuzz after wah: Jimi Hendrix famously used his Fuzz Face before his wah pedal (the opposite of standard order) because the Fuzz Face circuit interacted with the guitar’s volume knob in a way that required it to be first in the chain. This “wrong” placement created one of the most iconic guitar tones in history.
The key is understanding the standard order first, then breaking it intentionally for a specific sound rather than accidentally creating tonal problems.
Powering Your Pedalboard
Using individual wall-wart power supplies for each pedal creates ground loop hum, clutters your setup, and introduces noise. An isolated power supply provides clean, dedicated power to each pedal from a single unit. And before you reach for whatever adapter is lying around, it is worth checking whether you can use any power supply with a pedalboard — the wrong voltage or polarity can destroy a pedal in seconds.
Recommended: The Voodoo Lab Pedal Power 2 Plus ($180) has been the gigging standard for years. The Strymon Zuma ($300) offers more outputs with higher current capacity for digital pedals. For tight budgets, the Donner DP-1 ($40) provides basic isolated power for 8 pedals.
Poor power causes hum, buzz, and digital noise that ruins your tone regardless of pedal order. If you hear ground loop noise, your power supply is usually the first suspect.
Building Your First Pedalboard
Start with three pedals: a tuner, one drive pedal, and one delay or reverb. Master those three before adding more. Every pedal you add creates another variable to manage, another cable that can fail, and another potential noise source in your signal chain.
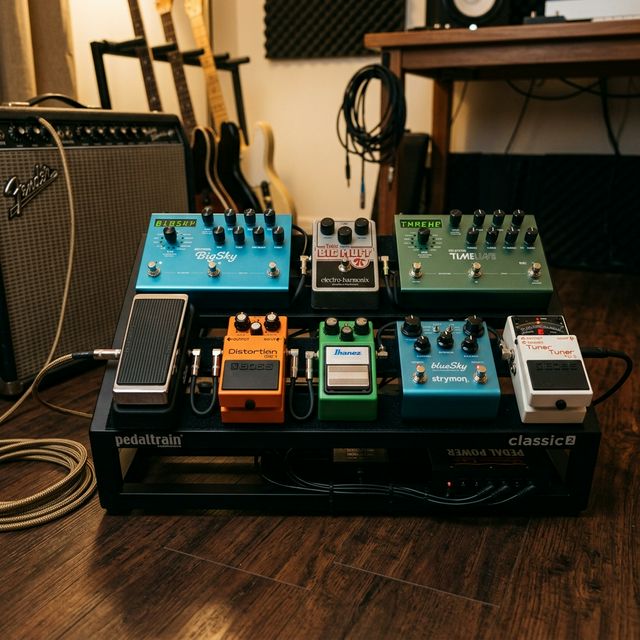
A Pedaltrain Nano ($50) or similar small pedalboard keeps three to five pedals organized and portable. Velcro strips secure the pedals, and the elevated design lets you run cables underneath cleanly.
Related Reading
- Best Bass Guitars Under $500: 7 Models That Punch Above Thei
- Best Studio Monitors Under $300
- Best Wireless In-Ear Monitors for Musicians
- Best Drum Machines for Beatmakers: Hardware That Hit
- Stratocaster vs Telecaster: Which Fender is Right for You?
- Best Multi Effects Pedal for Guitar
- Best MIDI Keyboard for Beginners and Producers
- Acoustic vs Electric Guitar: Which to Learn First
- Best Acoustic Guitars for Beginners: 7 Tested Picks
- Best Loop Pedals for Live Performance
- Guitar String Gauge Guide: How to Choose the Right Strings
- Are Expensive Guitars Worth It? A Guitarist’s Honest Take
- How to Set Up a Home Recording Studio on a Budget
- Read more about Guitar Pedals Explained
- Read more about Eliminate Ground Loops Studio
- Read more about Guitar Amp Tubes Vs Solid State
- Read more about How To Mic A Guitar Amp

Music Gear Specialist Review Desk
Research-based reviewsResearch-based reviews · Manufacturer specs · Verified owner feedback
We review guitars, amps, pedals, and recording gear the honest way: spec sheets, published measurements, and the collected experience of working musicians and verified owners.